In September, we shared speedy breakfast ideas to help us all slow down the morning rush a bit. We want everyone to get where they’re going in the a.m. more safely. Now, we’re sharing five school lunch-making strategies, one each Sunday for five weeks –– in hopes it will help us face the week armed with inspiration (along with a cup of strong coffee).
 These meals use whole grains as focal points, which pack nutritional punch when packed in kids’ lunches. Not to be confused with refined grains, like those found in white bread and rice or many snack crackers and cakes (even the enriched versions), a whole grain has the entire grain still intact. Even making “half your grains whole,” as we nutrition nuts like to say, is a head start. When our children bite into whole grain-based lunches, here is what they’re gaining:
– Complex Carbs for energy to power through the rest of the school day, as well as a steadier blood sugar to avoid “hangry” tantrums after school.
– Fiber for, well, think poo emoji. Encourage your child to drink plenty of water though because lack of adequate hydration can counteract this benefit. Kids may even crave fewer packaged, processed snacks when they’re satiated from higher-fiber intake. But, in fairness, I’m no miracle worker, and my kids still guzzle goldfish like maniacs. Ugh.
– Protein, Vitamins, Minerals, Antioxidants, and Other Plant Compounds for disease resistance and an immunity boost, essential as cool weather ramps up.
For those unable to process the gluten found in barley, rye, and wheat, there are still plenty of good (easy-to-pronounce) whole grain options like oats, brown or wild rice, corn, and quinoa (Okay, that one is trickier; it’s “keen-wah.”)
Since our children are unlikely to trade a pack of gummy fruit snacks for a scoop of oats or barley, here are some get-real, kid-friendly ideas.
PS: I’m one of those weirdos who actually enjoys preparing my kids’ school lunches and breakfasts (well, most mornings.) When I do, I feel like I’m setting them up to learn well, to play hard, and to know they are loved. At the end of the day though, Smarty Mamas, nutrition aside, when we send our small people out into the world knowing we love them unconditionally –– whether they have cafeteria cash, a pre-packaged lunchable, or homemade meal in hand –– that is what matters most.
So have fun with these weekly ideas, and let us know how you riff on them in the comments. We can all use more help, right?
Week 1: Start with Whole Grain Snacks
– Char-kid-erie
– Trail Mix Smorgasbord
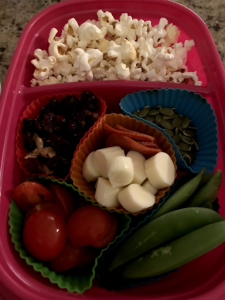
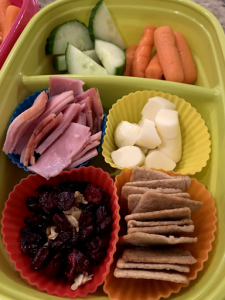
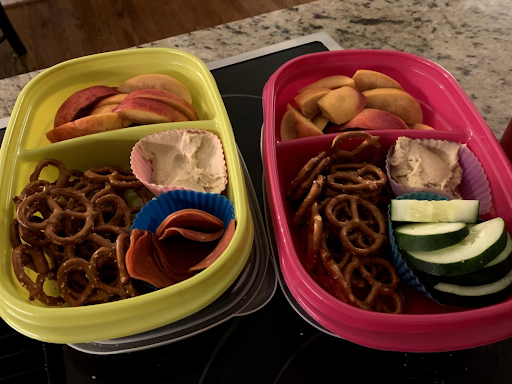
 The basic idea here is to fill up muffin cups, or a Bento-style box, with a variety of options starting with a whole grain snack cracker like wheat thins or Triscuits or a whole grain hearty snack like popcorn. Save money, and use what you have on hand before it winds up in a landfill as food waste. This tactic is also handy for highly-selective palates because you can vary each lunch by preference –– and introduce one new food item every now and then.
Some ideas for additional fillings and color…
– Low-Sodium Seeds & Nuts (if permitted): Pepitas, Sunflower, Almonds, Pistachios, Peanuts
– Reduced-Sugar Dried Fruit & Granolas: Apricots, Craisins, Pineapple, Cherries, Mango
– Fresh, Packable Fruit: Sliced Apples, Grapes, Blueberries, Mandarin Orange Segments, Grape Tomatoes
 – Finger-Friendly Veggies: Carrot sticks, Pepper Slices, Cucumber Halves, Sugar Snap Peas, Edamame, Pickle Slices, Olives
– Low-Sodium, High Protein Items: Turkey Pepperoni, Diced Ham, Turkey Shreds, Turkey Jerky, Cheese Cubes, Boiled Eggs, hummus
Quick Tip: Place a napkin on top of it all and then the container lid. This will keep everything from going everywhere. You know how kids can be when one food item touches another. How dare you touch my pretzels, raisins!
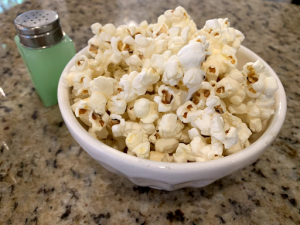
No extensive recipe needed to pop your own popcorn either (freeing your brood from some of the undesirable chemicals found in many microwave versions). Pop a big batch by heating a single kernel (choose non-GMO if you can) in ¼ cup extra virgin olive oil. When it pops, add 1 cup of kernels, cover, and heat until popping slows. Use a large stockpot! To avoid scorching, be sure to shake and lift the pot frequently to spread out the hot oil. I place a dish towel on top while shaking to be safe. To control salt while still adding flavor, I add 1 teaspoon to the pot once popped and shake with lid on to distribute evenly. It stores nicely in the pantry all week.


