Smarty Anne, and I were discussing a very serious topic during our little ones’ parent-tot gymnastics class last week: what do we do when our daughters have outgrown the big, beautiful Southern hair bow? Headbands don’t always work – sometimes they almost make things look messier. Hair still needs to be pulled out of their faces, but we want something cuter than just a plain ol’ rubber band or barrette. So, what’s next? What’s in between a huge Southern bow and a teenage-messy-bun?
Then, like a flash of lightening, it struck us both at the same time: braided barrettes! Remember those? We all loved them as kids in the 80s – why not bring them back for our girls?!
After a little Internet tutorial searching, we came up with the perfect formula. Anne made a mad dash to Michael’s and Eckerd’s for supplies and was nice enough to drop some off for me because I was house-bound with a play date. Here’s what we came up with – they’re super easy and a great thing to do while you’re just watching trash TV!
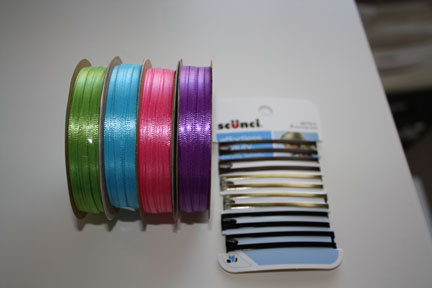
What you’ll need:
Barrettes, two different colors of 1/8″ wide ribbon, and scissors.
Cut both ribbons at about 36 inches 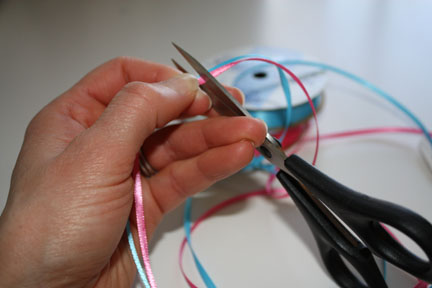
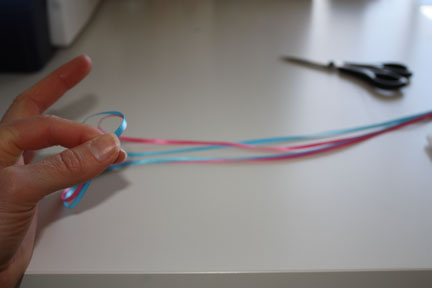
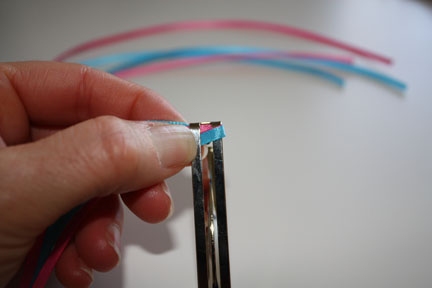
Find the middle of the two ribbons and hold it. Place one color on top of the other.
Note: It was at this point in my photography session (which, by the way is much harder than it looks – major props to all those crafting and food bloggers everywhere!) that I decided the winter – not my age, of course – had taken a huge toll on my hands and I needed lotion. Don’t do this. Don’t apply lotion at this point. You’ll feel like you’re threading water from here on out. Mark my words.
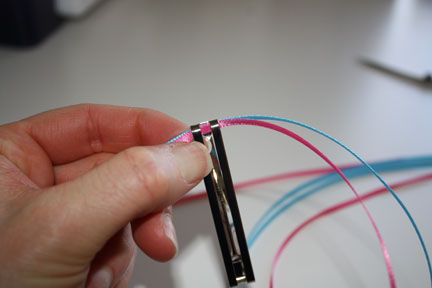
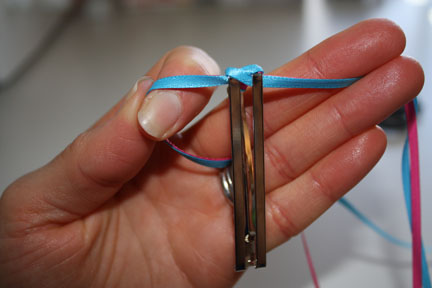
Place the center of the two ribbons under the top grove of the barrette – not sure what it’s called but that’s why I took pictures. I actually should have taken a picture of the barrette at an angle but it’s at the top of the barrette – where it clasps. Make sure the ribbons are still stacked so you have one color on top of the other.
Braid the right side over the left through the hole in the barrette. Your bottom color will now be the top.
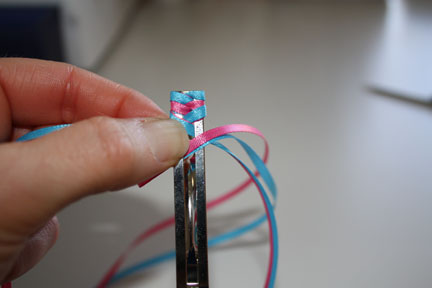
Do the same thing on the left making sure the bottom color is on top. (See how shiny my hands are? Greasy, I tell you! Don’t do it!! Lotion and crafting do not mix!)
Start on the RIGHT side again, braiding it through. This time your second color will be on top. Keep going just like this, making sure to pull it taut each time.
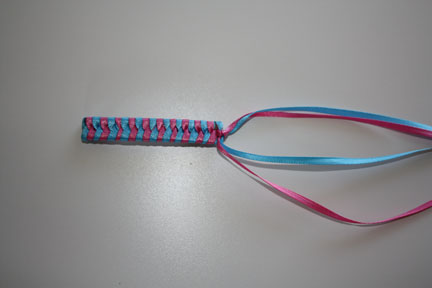
When you get to the end, tie a double knot and voila! It’s done! If you really want to get crazy, you can add some beads to the end of the strings, but I didn’t have any. That’s my project for next week.
I guarantee your daughter will think they are super cool. I’ve already got orders from my daughter’s friends. They’ll never know that their mamas are the ones who started this trend 25 years ago!! Hee hee!!!
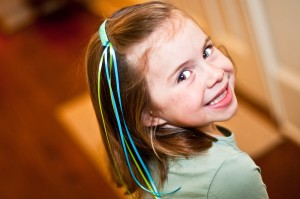
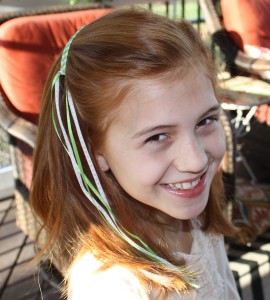
Here are the lil’ Smarties modeling their newest hair bling:



8 comments
Totally LOVE this! I remember how fun these were. Thanks for digging these out of the archives!
This brought back so many memories – I remember my mom making these for me! Love it – thanks for the inspiration!
love this! nice tutorial! kate loves her’s. i love how you can customize. she has requested a school colors one for instance. like the pink and blue!
I LOVED these when I was little- I wore them in my 4th grade Catholic school picture, with ribbons that matched my uniform!!
I loved these and even strung clear beads on the bottoms of the ribbons for some of mine for some extra bling!
Super cute! But I disagree with you about those “big, beautiful, southern hair bows.” (Well, I do agree that they are big, southern, and hair bows).
I remember making these at birthday parties and sleepovers! This is all I wore in elementary school. We will definitely make some! I’m feeling that I need some hand lotion now!
Thanks Cheryl for the memories. I just made these to be given as valentine gifts instead of candy for my kids classmates.